What Makes This Easy Fudge Recipe So Special?
Fudge is one of those desserts that everyone loves, but many people think it’s difficult to make. The good news? This easy fudge recipe proves that making rich, creamy, and chocolatey fudge is simple and foolproof—no candy thermometer or complicated techniques required! 🍫✨
What makes this recipe special?
✔️ Only a Few Ingredients – Just chocolate, condensed milk, and butter!
✔️ No Baking Required – It’s a no-bake, stovetop dessert.
✔️ Quick to Make – Takes only 10 minutes of prep time!
✔️ Perfectly Creamy – Smooth, melt-in-your-mouth texture.
This easy fudge recipe is great for holiday gifts, parties, or a sweet treat anytime. Plus, you can easily customize it by adding nuts, caramel, or different flavors.
“Making fudge at home is easier than you think—just melt, mix, pour, and let it set!”
The History of Fudge – How It Became a Classic Dessert
Fudge is one of those timeless treats that has been enjoyed for generations. But where did it come from? Interestingly, the origin of fudge is believed to be a happy accident in the late 1800s!
How Fudge Was Invented
The first recorded batch of fudge is said to have been made in Baltimore, Maryland, when a confectioner “fudged” a batch of caramels, resulting in a soft, creamy chocolate treat instead of a chewy caramel. From that mistake, fudge was born!
By the late 19th century, fudge became a favorite among college students, especially at Vassar College, where students experimented with making their own versions using simple ingredients. Since then, fudge has become a staple in candy shops, home kitchens, and holiday traditions worldwide.
“Sometimes the best recipes come from happy accidents—fudge is proof of that!”
Why Fudge Remains a Popular Dessert Today
✔️ Easy to Make – Requires only a few ingredients.
✔️ Endless Variations – From chocolate and peanut butter to caramel and nuts, there’s a fudge for everyone.
✔️ Perfect for Gifting – Fudge makes an excellent homemade gift, especially during the holidays.
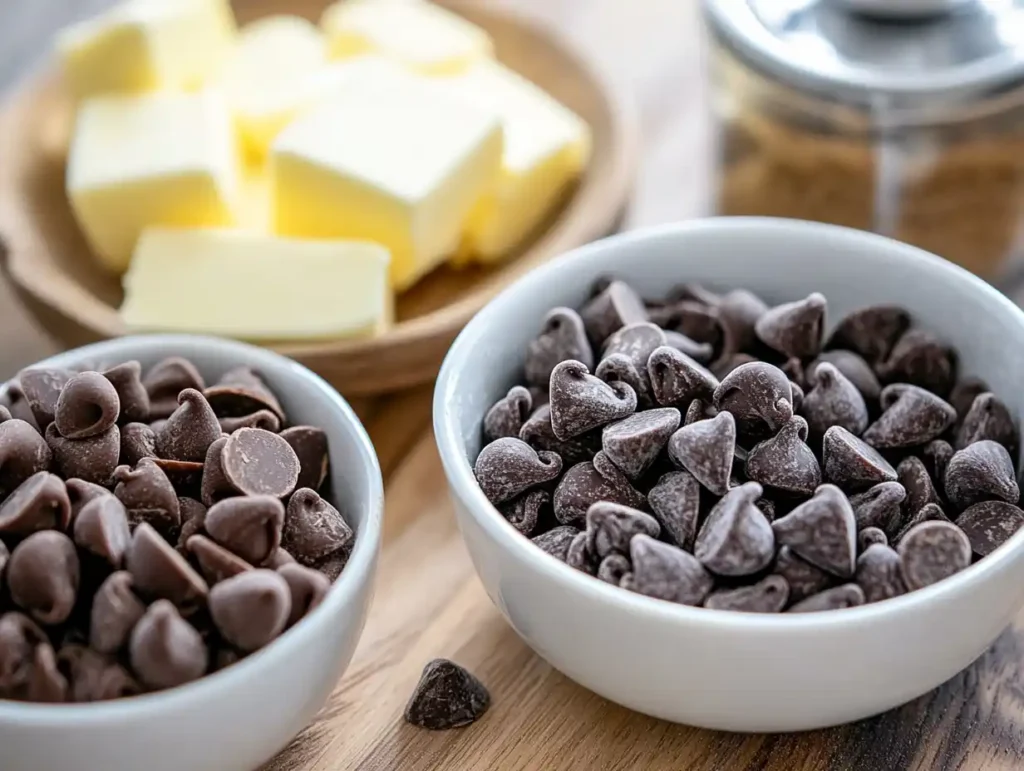
Key Ingredients for the Perfect Fudge
Making rich, creamy, and delicious fudge requires just a handful of ingredients. The key is to use high-quality ingredients to achieve the perfect texture and flavor.
Essential Ingredients and Their Role
| Ingredient | Purpose |
|---|---|
| Chocolate Chips (2 cups) | The base of the fudge, providing a rich and smooth chocolate flavor. 🍫 |
| Sweetened Condensed Milk (1 can, 14 oz) | Adds sweetness and helps create the creamy texture. 🥛 |
| Unsalted Butter (2 tbsp) | Gives the fudge a soft, melt-in-your-mouth feel. 🧈 |
| Vanilla Extract (1 tsp, optional) | Enhances the chocolate flavor and adds depth. 🌿 |
| Salt (¼ tsp) | Balances the sweetness and enhances flavor. 🧂 |
| Optional Add-Ins: Nuts, Caramel, Sea Salt | Customizes the fudge with extra texture and flavor. 🍯 |
✅ Pro Tip: Use high-quality chocolate chips or baking chocolate for a richer taste and smoother consistency.
“The secret to smooth, creamy fudge is using the right balance of chocolate and condensed milk—no grainy texture, just melt-in-your-mouth perfection!”
Choosing the Best Chocolate for Fudge
Not all chocolate is the same when it comes to fudge! Here are the best options:
✔️ Semi-Sweet Chocolate Chips – The most common choice for a balanced, rich flavor.
✔️ Dark Chocolate (60-70% Cocoa) – Perfect for a deeper, less sweet fudge.
✔️ Milk Chocolate – Creates a sweeter, creamier fudge.
✔️ White Chocolate – Ideal for a different take on classic fudge.
If you love mixing chocolate flavors, try using a blend of milk and dark chocolate for the perfect balance.
✅ Pair your homemade fudge with other fun desserts! If you love chocolate treats, you’ll enjoy making this delicious Brookies Recipe (Brownie + Cookie Mix) for an indulgent dessert combination! 🍪🍫
How to Make Easy Fudge Recipe – Step-by-Step Guide
Making homemade fudge is super simple, and this easy fudge recipe requires only a few basic steps. You don’t need a candy thermometer or any fancy equipment—just melt, mix, pour, and set! 🍫✨
Step 1: Preparing Your Ingredients and Tools
Before starting, make sure you have everything ready to go.
✔️ Line a Baking Pan – Use parchment paper or lightly grease an 8×8-inch baking dish to prevent sticking.
✔️ Measure Ingredients – Having everything prepped makes the process smoother.
✔️ Choose Your Mix-Ins – If adding nuts, caramel, or other flavors, set them aside now.
✅ Pro Tip: Chilling the lined pan in the fridge while preparing the fudge helps it set faster.
“A little prep work before starting makes the fudge-making process effortless and mess-free!”
Step 2: Melting the Chocolate to the Perfect Consistency
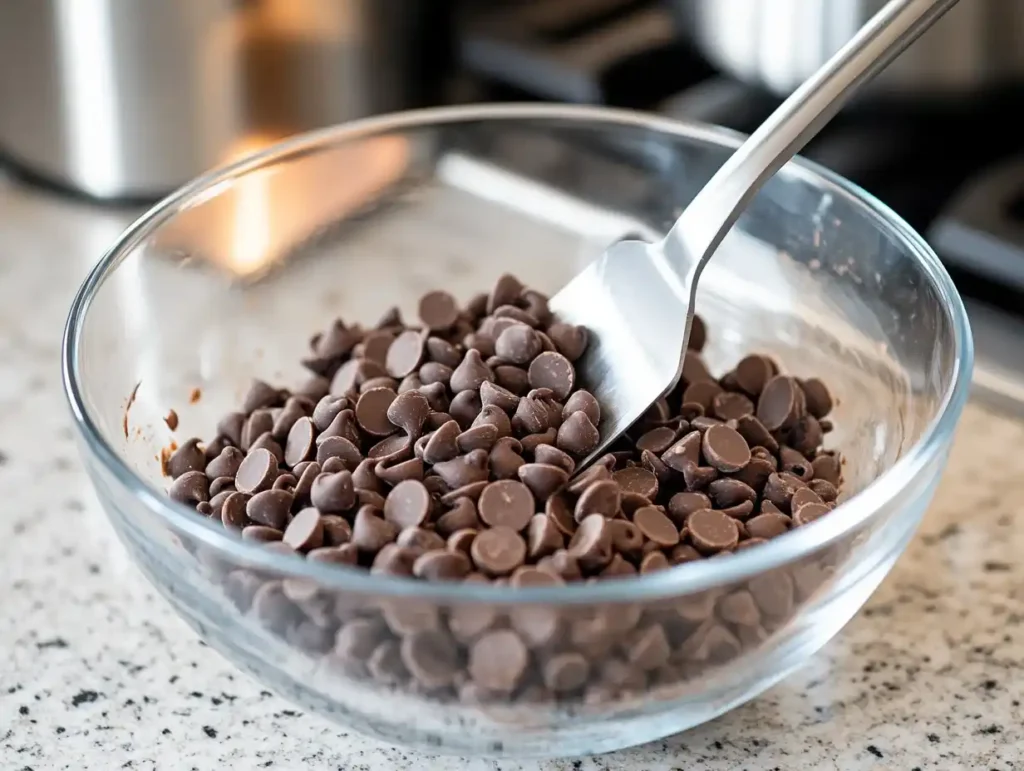
The key to smooth, creamy fudge is melting the chocolate properly without overheating. Here’s how:
1️⃣ Double Boiler Method: Place a heatproof bowl over a simmering pot of water (make sure the bowl doesn’t touch the water).
2️⃣ Add Chocolate, Butter & Condensed Milk: Stir gently until melted and smooth.
3️⃣ Remove from Heat & Add Vanilla (if using) – This enhances the chocolate flavor.
✅ Pro Tip: If using a microwave, heat in 20-second intervals, stirring in between, to avoid burning the chocolate.
Step 3: Mixing and Pouring – Getting the Right Texture
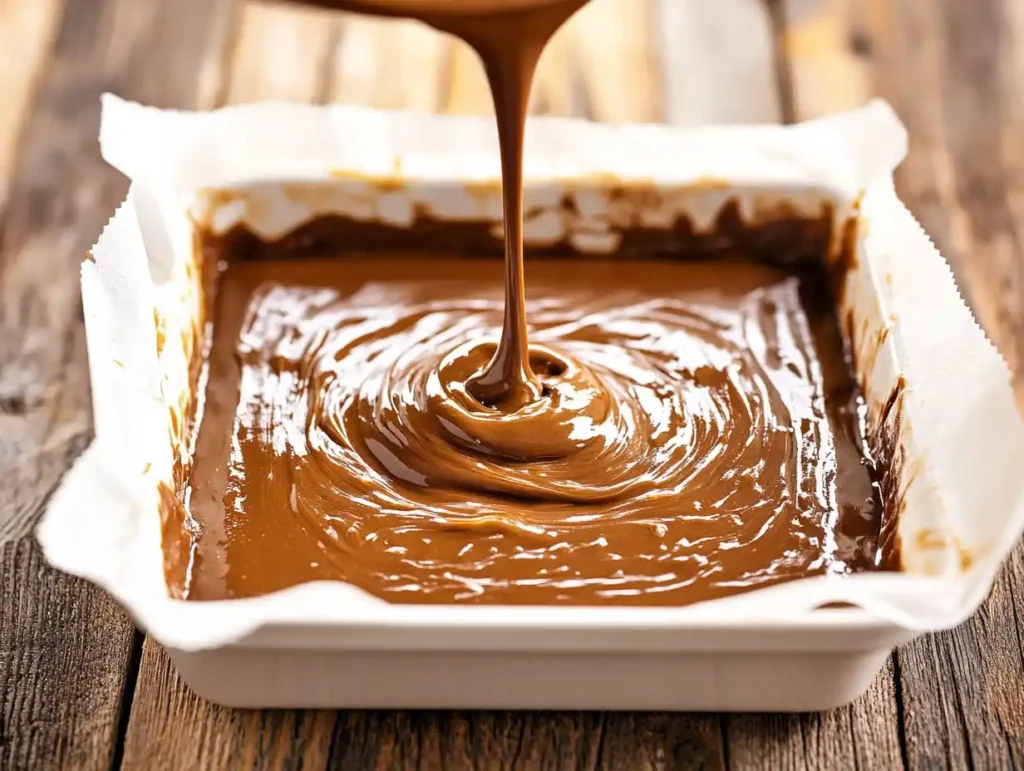
1️⃣ Stir the Mixture Well – Make sure everything is fully combined and glossy.
2️⃣ Pour into the Lined Baking Dish – Spread it evenly with a spatula.
3️⃣ Tap the Pan Gently – This removes any air bubbles for a smooth finish.
“A silky-smooth mixture ensures your fudge sets perfectly without cracks or graininess!”
✅ Looking for more fun and colorful desserts? Try this magical Unicorn Cake Recipe for a vibrant and festive treat! 🎂✨
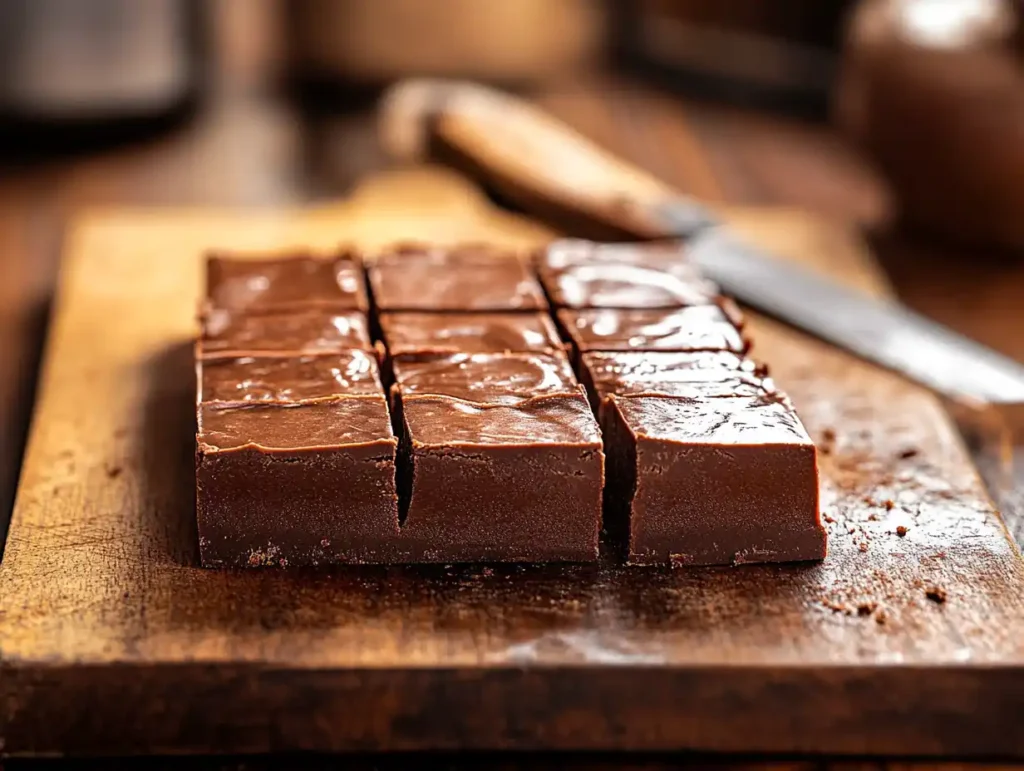
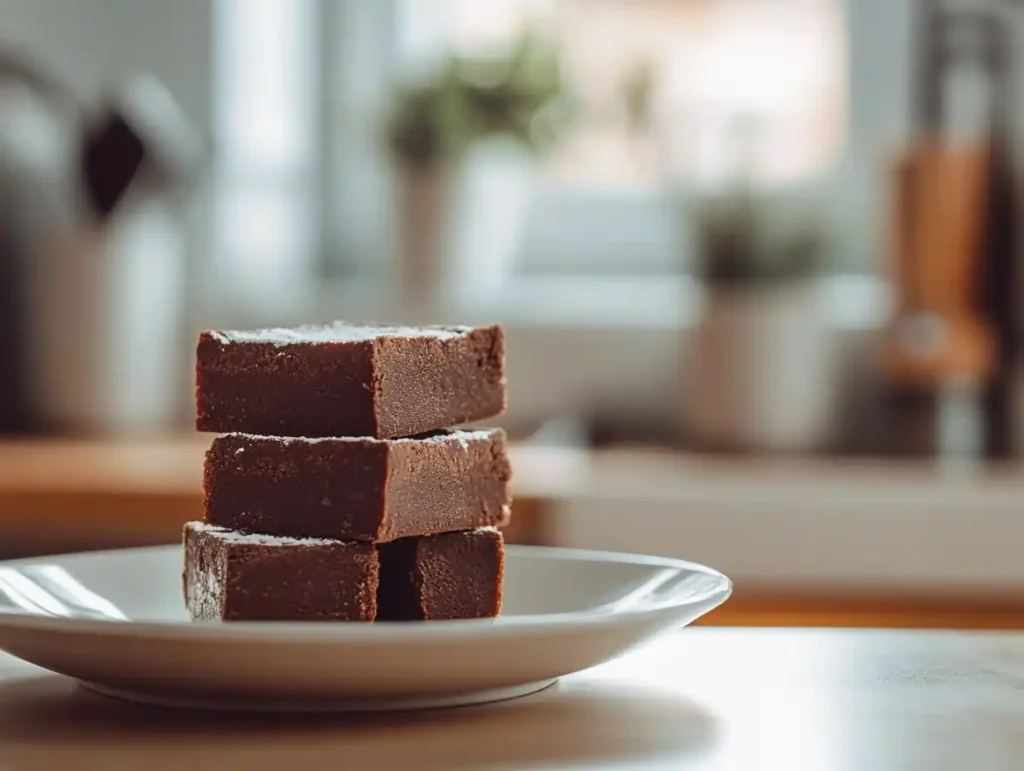
Step 4: Letting the Fudge Set and Cutting Perfect Squares
✔️ Refrigerate for at Least 2-3 Hours – The longer it chills, the firmer it will be.
✔️ Use a Sharp Knife to Cut Even Squares – Run the knife under warm water for clean cuts.
✔️ Store Properly – Keep in an airtight container for freshness.
✅ Pro Tip: If you want extra soft fudge, let it sit at room temperature for 5-10 minutes before cutting.
Creative Variations of This Easy Fudge Recipe
Fudge is a classic treat, but why not customize it with unique flavors and mix-ins? With just a few tweaks, you can turn a simple fudge recipe into a gourmet dessert that suits any occasion.
Adding Nuts, Caramel, or Sea Salt for Extra Flavor
Adding textures and flavors to fudge takes it from basic to irresistible. Here are some delicious mix-ins to try:
🥜 Nuts – Almonds, walnuts, pecans, or hazelnuts add crunch and depth. Toast them first for extra flavor!
🍯 Caramel Swirl – Drizzle caramel into the fudge before it sets for a gooey, sweet contrast.
🧂 Sea Salt – A light sprinkle of flaky sea salt enhances the richness of chocolate.
🍪 Cookie Crumbles – Crushed Oreos or shortbread give fudge a fun, crunchy twist.
✅ Pro Tip: If adding mix-ins, stir them in just before pouring the fudge into the pan to ensure even distribution.
Fun Flavors: Peanut Butter, Mint, and White Chocolate
Want to get even more creative? Try these flavor variations:
🥜 Peanut Butter Fudge – Swirl in creamy or crunchy peanut butter for a nutty, rich flavor.
🌿 Mint Chocolate Fudge – Add a few drops of peppermint extract for a cool, refreshing twist.
🍫 White Chocolate Fudge – Replace dark chocolate with melted white chocolate for a smooth, vanilla-infused version.
☕ Mocha Fudge – Mix in a teaspoon of instant espresso powder for a subtle coffee kick.
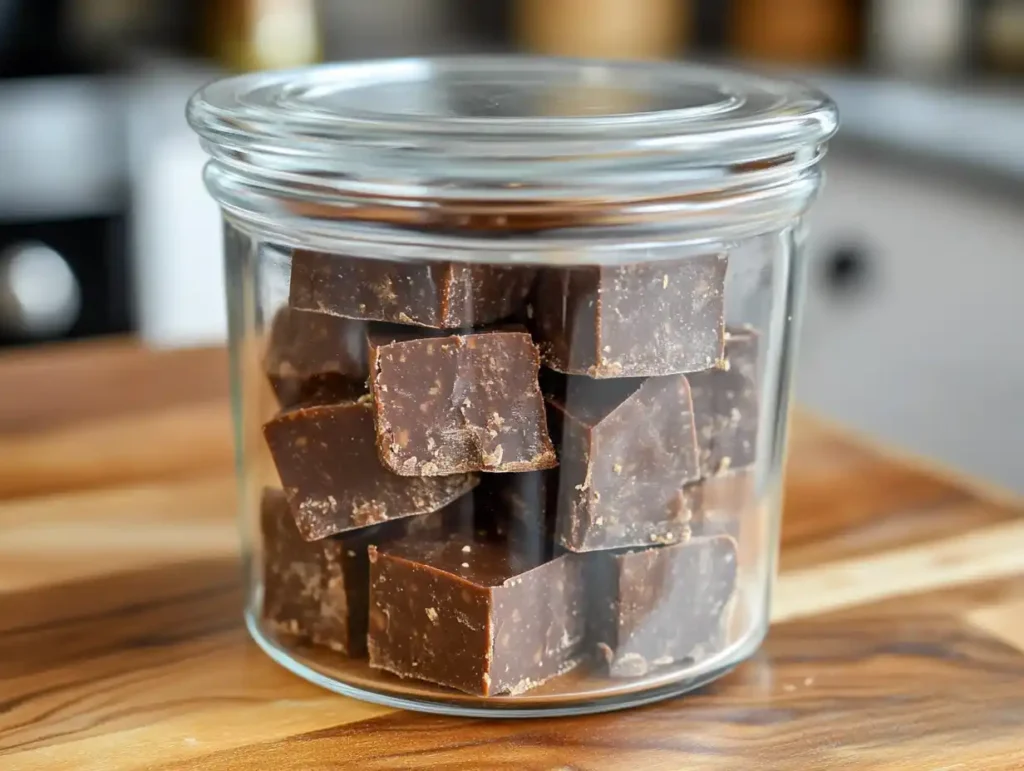
Storing and Preserving Homemade Fudge
Proper storage is key to keeping fudge soft, creamy, and flavorful for as long as possible. Whether you’re saving it for later or gifting it, follow these tips to extend its freshness.
How Long Does Homemade Fudge Last?
Homemade fudge can last from a few days to several months, depending on how you store it.
✔️ Room Temperature: Lasts 1-2 weeks when stored in an airtight container in a cool, dry place.
✔️ Refrigerated: Stays fresh for 2-3 weeks in an airtight container. This helps keep it firm.
✔️ Frozen: Can last up to 3 months when wrapped properly in plastic wrap and stored in an airtight bag or container.
✅ Pro Tip: For longer shelf life, store fudge in small, pre-cut portions so you only take out what you need without exposing the rest to air.
Best Ways to Store Fudge for Freshness
Follow these storage methods to keep your fudge tasting fresh and delicious:
🛑 Avoid Direct Sunlight & Heat – Store fudge in a cool, dry place to prevent melting.
📦 Use an Airtight Container – Prevents the fudge from drying out and absorbing other food odors.
🧊 Layer with Parchment Paper – If stacking fudge pieces, separate them with parchment to avoid sticking.
❄️ Freeze for Long-Term Storage – Wrap each piece in plastic wrap, then place in a freezer-safe bag.
✅ Pro Tip: Enjoy frozen fudge by letting it thaw at room temperature for 15-20 minutes before serving—it will taste as fresh as the day you made it!
Common Mistakes and How to Avoid Them
Even though this easy fudge recipe is simple to follow, there are a few common mistakes that can lead to grainy, too-soft, or crumbly fudge. Here’s how to fix them and ensure perfect results every time! 🍫✨
The Secret to Smooth, Creamy Fudge Every Time
Nothing’s worse than fudge that turns out grainy or crumbly instead of smooth and creamy. Here’s how to avoid that:
❌ Overheating the Chocolate – If chocolate gets too hot, it can become grainy or seize up.
❌ Not Stirring Enough – Uneven mixing can cause lumps.
❌ Using the Wrong Chocolate – Low-quality chocolate can lead to a chalky texture.
✅ How to Fix It:
- Melt chocolate slowly over low heat or in short microwave bursts.
- Stir continuously to keep the mixture smooth.
- Use high-quality chocolate chips or baking chocolate for the best texture.
How Long Does Homemade Fudge Last?
Proper storage is essential for keeping fudge fresh and delicious. Here’s what you need to know:
✔️ At Room Temperature – Keeps for 1-2 weeks in an airtight container.
✔️ In the Refrigerator – Stays fresh for up to 3 weeks.
✔️ In the Freezer – Can be stored for 2-3 months (wrap tightly in plastic wrap + a freezer bag).
✅ Pro Tip: Want a meal to enjoy before indulging in dessert? Try this hearty and comforting Old-Fashioned Stuffed Bell Peppers Recipe for the perfect dinner pairing! 🫑🍽️
FAQs About Easy Fudge Square Recipe
Still have questions about making perfect homemade fudge? Here are answers to some of the most common fudge-related questions to help you get it right every time! 🍫✨
What is the secret to good fudge?
The key to smooth, creamy fudge comes down to:
✔️ Using High-Quality Chocolate – Low-quality chocolate can result in a chalky texture.
✔️ Melting Chocolate Slowly – Overheating causes chocolate to seize and become grainy.
✔️ Proper Ratios – Stick to the classic 2:1 ratio of chocolate to condensed milk.
✔️ Allowing Enough Cooling Time – Let the fudge set in the fridge for at least 2-3 hours.
✅ Pro Tip: Always stir continuously while melting chocolate to avoid clumps or burning!
Is it better to use condensed milk or evaporated milk for fudge?
Both can be used, but sweetened condensed milk is the best choice for this recipe! Here’s why:
✔️ Condensed Milk: Adds richness, sweetness, and creaminess (Best for no-fail fudge!).
✔️ Evaporated Milk: Lacks sugar and is thinner, making fudge less sweet and firm.
✅ Bottom Line: If you’re making easy fudge, always use sweetened condensed milk for the best results!
Why is my 3 ingredient fudge not setting?
If your fudge is too soft, it may be due to:
❌ Too Much Condensed Milk – Stick to the correct ratio to prevent overly soft fudge.
❌ Not Chilling Long Enough – Fudge needs at least 2-3 hours in the fridge to firm up.
❌ Warm Storage – Fudge melts easily at room temperature in warm climates.
✅ How to Fix It:
- Chill for longer, or place in the freezer for 30 minutes for a quicker set.
- Always store fudge in an airtight container in the fridge to keep it firm.
How long does homemade fudge last?
Fudge stays fresh for a long time if stored properly:
✔️ Room Temperature: 1-2 weeks (airtight container).
✔️ Refrigerator: Up to 3 weeks (best for freshness).
✔️ Freezer: 2-3 months (wrap tightly before freezing).
✅ Pro Tip: To enjoy frozen fudge, let it thaw at room temperature for 15-20 minutes before eating.
How to make fudge easy recipe?
If you’re looking for the simplest way to make fudge with no fuss, follow these quick steps:
1️⃣ Melt chocolate and butter using a double boiler or microwave.
2️⃣ Stir in condensed milk until smooth and fully combined.
3️⃣ Pour into a lined baking dish and spread evenly.
4️⃣ Refrigerate for 2-3 hours until firm.
5️⃣ Slice and enjoy! 🍫✨
That’s it—homemade fudge in just a few easy steps!
Final Thoughts – Enjoying Your Homemade Fudge
Making homemade fudge is easier than most people think, and this easy fudge recipe proves that anyone can create rich, creamy, and delicious fudge with just a few ingredients! 🍫✨
Whether you prefer classic chocolate fudge, enjoy fun flavors like peanut butter or caramel, or love adding nuts and toppings, this recipe is completely customizable and perfect for any occasion.
✔️ Quick and Simple – Takes just 10 minutes of prep time.
✔️ No Candy Thermometer Needed – A fail-proof method for smooth fudge.
✔️ Perfect for Gifting – Make a batch for the holidays, birthdays, or special occasions.
“Homemade fudge is more than just a treat—it’s a sweet tradition that brings people together!”
Final Tips for the Best Fudge Every Time
🔹 Use high-quality chocolate for the richest flavor.
🔹 Melt chocolate slowly to keep it smooth and creamy.
🔹 Refrigerate for at least 2-3 hours before slicing.
🔹 Store in an airtight container to keep it fresh.